MIRACLE WARRIORS - SEAL OF THE DARK LORD
Page 3
|
Medi joins the party
with no sword, shield or armour, so if she's going to be around for long,
you're going to have to remedy this situation. Don't bother with a sword
or armour for now, but you may wish to pick up a shield. Head West, following
the easiest terrain, and make for the Castle of Elatoria. Here, as long
as you have at least 300 fangs, you will be presented with a special sword
for Medi - Eros' Sword:
"Medi, let this sword
serve thee in battle. Master it and the Earth will aid thee. Eros' Sword!
It holds great power!"
Now go East to Torif
to get healed and stock up on herbs. You should let Guy and yourself do
most of the fighting at the moment as Medi is still to weak to take on
the tougher creatures. Gurols, Egaras and anything weak is fair game however
and should be used as sword practice for Medi. When Medi fights, you will
notice that she occasional gets a "Crushing Attack". This enables her to
do more damage than a normal blow.
After stocking up, head
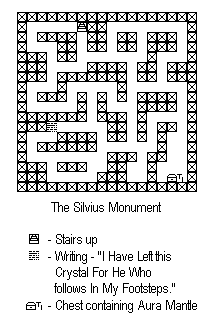
east and skirt North around the desert. Ignore the monument for now, you're
looking for a cave hidden in the forest North of Phrixos. Enter the cave
(it's locked, but Medi can pick any lock) and face the Senpi inside. Use
the normal routine (magical items followed by swordfighting) and you'll
gain the Armour Of Athena for Medi.

|
|
Get A Little Extra Help....
|
| After leaving the cave,
head East and across the narrow strip of land that joins Thebe & Phrixos.
In the land of Iphis, you will find a small village. Here, you can exchange
50 fangs for a Stone of Protection. Up to six may be carried and you use
them in battle to try and destroy an opponents spellcasting abilities.
They don't always work, but are essential in your battles against the larger,
magical, creatures. Buy six.
Now it's Guy's turn to
get some armour. Return to the village where you get the Staff of Earthquakes
and buy a full quota. If you need to, visit Torif for healing and herbs.
Head back to the Kadmos peninsula (where you bought the boat). In the South-West
corner is a cave. Remember to ensure the party is fully healed before entering.
Once inside you need to battle the Senpi in the usual way, but this time
you probably won't have any sacred nuts. Not to worry, as you have Stones
of Protection. Use these until you are told that the enemy spell has been
stopped - the Senpi can no longer use any magic for the duration of the
battle. Blast it with Staff's, then polish it off with your swords.
After the battle, heal
the party then make the long trek towards the Swordsmith's village. The
plains of Marula & Apheidas should prove easy for your party now, so
take the opportunity to build up Medi's experience. Once at the village,
upgrade Medi's sword. If you can't afford it, you'll need to do some more
fighting. You now need to stock up on nuts, staff's and stones (if needed).
|
|
Down, Down, Deeper & Down
|
 |
Make your way back to
the town of Doris (take the opportunity to heal up if necessary). Once
there, set off East across the Cloelia Channel until you find the island
of Ikaros. Hidden in the mountains of this island is a cave. Inside is
the toughest creature you'll have met so far - the Hanj, so you are strongly
advised to save the game before entering.
 |
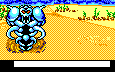
The Hanj - And you thought
the Senpi was bad! Defeating this guardian will cost you -1000 Charisma
points. |
You'll need to use up all
your nuts and staff's first, then the stone (or stones) to stop the Hanj
casting any spells. Finish off the Hanj with hand to hand combat, but be
warned! This is a very tough opponent! It will be a close run thing as
to whether you manage to do this and keep all three members of the party
alive. If anyone dies then you are going to have to get them to the Village
of Restoration. Even if you do manage to get out alive, the party is
going to be extremely battered. Take a few moments to rest and repair the
damage by taking herbs, then get back to Doris for a full rejuvenation
and replenishment of supplies.
So what of our ill gotten
gain? You will now have Ulysses' Shield, the shield used by Iason himself.
This shield has the power to neutralise Black Magic and is the only item
that can rescue Treo from his curse. It is wielded by you, and if you check
the Status screen, then you will see that you now have all three of Iason's
Arms. All you have to do now is find Treo and fully equip the rest of the
party. Easy, huh?
|
|
|
Finding Treo & Completing The
Ancient Scroll
|
|
|
Finishing Arming The Party
|
| Your aim now is to finish
equipping the party with all their special weapons and abilities, before
going looking for Terarins lair. Head West from Galia, into the mountains
just over the water. Here, is another locked cave which you should enter.
Inside is a Hanj guarding the Shield of Celene. This is a tough fight,
so make sure you are fully equipped with nuts (11, not 9), Staff and Stones.
You may also need a modicom of luck. There is a good chance someone will
die here, so make sure you save the game before you enter the cave. Once
you defeat the Hanj, Medi will gain the Shield. Heal the party, then head
back to Galia for urgent restocking of supplies. Once done, you are going
to have to go and build your supply of offensive magical items again. Use
this opportunity to build up Treos ability. I recommend you visit the village
where Stones of Protection can be found, then the village where you purchase
the Staff of Earthquakes. Now head for the forests where Liphants roam,
to stock up on Sacred Nuts.
Once you have all the
magical items, head West and make for the Swordsmith's Village. Here you
can get Treo's axe upgraded. All you are missing now is Guy's shield. If
you require healing or herbs, then head for Minos, else head into the desert
near the Swordsmith's Village and head North. You are looking for a mountain
range near a lake. Here you should find a cave which you should enter.
Inside is a Hanj guarding the Shield of Hector. When you defeat the Hanj,
Guy will claim the Shield of Hector and your parties arsenal of weapons
should be complete. Below is a summary of some of the creatures you can
expect to meet in the Desert of Gorophonos:
 |
Desert Mammoth. Killing
one gives you 35 Fangs and +80 Charisma. |
 |
Jaral. A bizarre form
of Giant Scorpion. Its defeat gives you 25 Fangs and +50 Charisma. |
 |
Desert Worm. This foe
is able to cast Sleep spells. Worth 25 Fangs and +60 Charisma. |
 |
Laduor. This one casts
Fire spells. Worth 40 Fangs and +70 Charisma. |
Heal up after this battle
and then head North West and into the centre of the small lake. You will
see a small village, where you will be given the ship that will allow you
to cross the stormy seas to Areos - but only if Treo is with you! You'll
now need to head back to Minos to heal and gain herbs, then its off on
the 'World Tour' to replenish your supply of magical items. You are advised
to collect the Staff of Earthquakes last, you'll see why in the next section.....
|
So, you are now on Areos.
All that remains now is for you to find and defeat Terarin! Find out how
in Part 4, coming soon......
|